


For vinyl enthusiasts, there’s nothing worse than a scratchy record or a needle skipping over dust and grime. Keeping your vinyl records clean isn’t just about aesthetics—it’s essential for preserving sound quality and extending the life of your collection. While professional cleaning machines exist, you don’t need fancy gear for great results. Here are some tried-and-true DIY methods to clean your vinyl at home using simple tools and a little care.
Why Clean Your Vinyl?
Over time, records accumulate dust, fingerprints, and static, which can degrade playback and damage the grooves. Even new LPs can come with residue from manufacturing. Regular cleaning removes these culprits, ensuring your turntable delivers crisp, clear audio without harming the stylus. Plus, it’s a satisfying ritual that connects you to your music.
What You’ll Need
Before diving in, gather these basics:
- Distilled water (tap water has minerals that can leave deposits)
- Microfiber cloths or lint-free towels
- Isopropyl alcohol (90% or higher, optional for deeper cleaning)
- Soft brush (like a paintbrush or anti-static record brush)
- Dish soap (mild, unscented, and free of moisturizers)
- Record cleaning solution (optional, but easy to make)
- Gloves (optional, to avoid fingerprints)
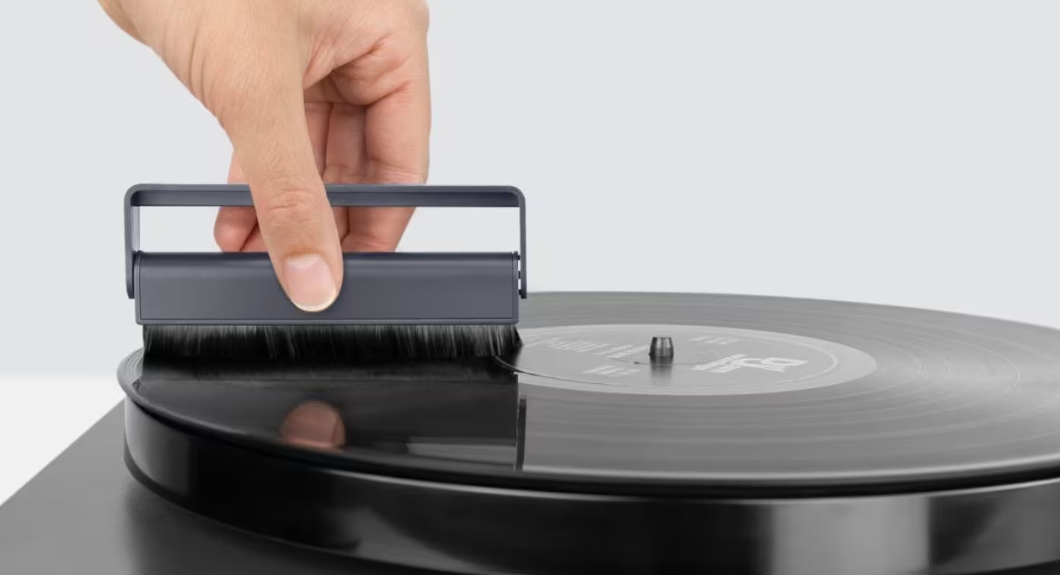
Method 1: Dry Brushing for Light Dust
- Best For: New records or light surface dust
-
How to Do It:
- Place your record on a clean, flat surface (not on the turntable to avoid strain).
- Use a soft, antistatic brush—a carbon-fiber one works wonders—and gently sweep in the direction of the grooves, from the outer edge to the label.
- Spin the record slowly as you go, letting the brush lift dust into its bristles.
- Tap the brush on a cloth to release debris, and repeat if needed.
- Pro Tip: This is a quick fix between plays. Pair it with a microfiber cloth lightly wiped in circular motions for stubborn dust.
Method 2: Wet Cleaning with Distilled Water and Soap
- Best For: Moderately dirty records with fingerprints or smudges
-
How to Do It:
- In a bowl, mix a solution of 1 cup distilled water with a drop of mild dish soap. Stir gently to avoid bubbles.
- Dampen a microfiber cloth with the mix—don’t soak it—and wipe the record in a circular motion, following the grooves. Avoid the label.
- Rinse by wiping with a second cloth dampened with plain distilled water to remove soap residue.
- Dry immediately with a dry microfiber cloth, or air-dry on a rack (like a dish rack) for 10-15 minutes.
- Pro Tip: First, test your soap on a less valuable record—some formulas can leave a film.

Method 3: Deep Cleaning with Alcohol Solution
- Best For: Grimy thrift-store finds or records with sticky residue
-
How to Do It:
- Create a mix of 3 parts distilled water to 1 part isopropyl alcohol (e.g., ¾ cup water, ¼ cup alcohol). Add a drop of dish soap for extra power.
- Dip a microfiber cloth or soft brush into the solution, then gently scrub the record in the groove direction.
- Rinse thoroughly with distilled water using a clean cloth to remove all alcohol and soap.
- Dry with a fresh microfiber cloth or air-dry upright.
- Caution: Use alcohol sparingly—too much can damage some vinyl over time. Stick to 25-30% concentration.

Method 4: The Glue Trick for Stubborn Dirt
- Best For: Heavily soiled records where other methods fail
-
How to Do It:
- Apply a thin, even layer of wood glue (PVA, like Elmer’s) across the record surface, avoiding the label. Spread it smoothly with a card.
- Let it dry completely—usually 12-24 hours—until it forms a solid film.
- Peel the glue off slowly from one edge. It’ll lift embedded dirt and debris as it goes.
- Pro Tip: Test this on a cheap record first—it’s practical but unconventional, and some vinyl might react differently.
Storage and Maintenance Tips
- Sleeves Are Key: After cleaning, store records in fresh inner sleeves (polyethylene-lined ones are best) and outer plastic covers to keep dust at bay.
- Vertical Storage: Keep LPs upright to avoid warping—never stack flat.
- Clean Your Stylus: A dirty needle can reintroduce grime. Use a stylus brush or gel cleaner weekly.
What to Avoid
- Tap Water: Minerals can leave spots or buildup.
- Paper Towels: They scratch vinyl and stick to microfiber or cotton.
- Overwetting: Excess liquid can seep into the label and ruin it.
Final Spin
Cleaning vinyl records at home doesn’t require a big budget—just patience and the right DIY approach. Whether brushing off dust or tackling a thrift-store haul with the glue method, these techniques will keep your collection pristine. So grab your turntable and a microfiber cloth, and get to work. Your LPs deserve the TLC, and your ears will thank you.

Leave a comment
All comments are moderated before being published.
This site is protected by hCaptcha and the hCaptcha Privacy Policy and Terms of Service apply.