

Let's face it, the act of digitizing vinyl can feel like a minor heresy to some purists. The very idea of transmuting those precious analog grooves into a string of ones and zeros might seem to strip away some of the magic. And in a way, it does – the physical ritual, the subtle warmth, the sheer presence of a record spinning is unique. However, let's also be pragmatic. Life in the 21st century demands portability, and the desire to preserve your irreplaceable wax, create custom playlists for on-the-go listening, or even sample deep cuts for your next DJ set is entirely valid.
This isn't about replacing your vinyl experience; it's about extending it. It's about making your beloved collection more accessible without sacrificing (too much of) its soul. At XJ-HOME, we believe in embracing the best of both worlds – the tactile joy of analog and the convenience of digital. So, let's explore how to become a modern-day alchemist, turning vinyl into high-quality digital audio.
The Alchemist's Toolkit: Essential Gear for Transmutation
Before you can begin the transformation, you'll need the right tools. The quality of your digital transfer will be directly proportional to the quality of your weakest link.
-
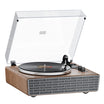
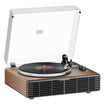
The Source: Your Turntable
-
USB Turntables: The most straightforward path. These have a built-in phono preamp and an Analog-to-Digital Converter (ADC), outputting a digital signal directly via USB.
-
Examples: Audio-Technica AT-LP120XUSB, Audio-Technica AT-LP60XUSB, Sony PS-LX310BT.
-
Pros: Simplicity, fewer components.
-
Cons: ADC quality can vary, often not as high-end as dedicated audio interfaces.
-
-
Traditional Turntables: Your standard hi-fi deck. This offers more flexibility and potentially higher quality but requires more supporting gear.
-
-
The Booster & Equalizer: Phono Preamp (Crucial for Non-USB Turntables without Line Out)
-
Vinyl records are cut with a specific EQ curve (RIAA equalization) that reduces bass and boosts treble to save groove space and reduce noise. A phono preamp reverses this curve and boosts the very weak signal from the cartridge to a usable "line level."
-
Built-in vs. External: Your turntable might have a built-in phono preamp (often switchable between "Phono" and "Line" output). Your amplifier/receiver might also have a "Phono" input. If neither, you'll need an external phono preamp.
-
External Examples: ART DJ PRE II, Schiit Mani, Pro-Ject Phono Box.
-
XJ-HOME Philosophy Connection: Investing in a decent phono stage, whether internal or external, is fundamental to good sound, a principle we champion at xenonjade.com when curating components that deliver true audio value.
-
-
-
The Translator: Audio Interface (If Not Using a USB Turntable)
-
This is the heart of the analog-to-digital conversion process if your turntable doesn't have a USB output. It takes the analog line-level signal (from your turntable's built-in preamp or your external phono preamp) and converts it into a digital signal your computer can understand.
-
Key Feature: The quality of its ADC is paramount.
-
Examples: Focusrite Scarlett series (e.g., 2i2), Behringer U-Phoria series (e.g., UM2, UMC22), PreSonus AudioBox series.
-
Inputs: Look for RCA or 1/4-inch line inputs.
-
-
The Conduits: Cables
-
RCA Cables: For connecting your turntable to a phono preamp or an audio interface's line inputs. Don't skimp too much here; decently shielded cables can reduce noise.
-
USB Cable: To connect your USB turntable or audio interface to your computer.
-
Ground Wire: Absolutely essential if your turntable has one. Connect it from the turntable to the ground screw on your phono preamp or amplifier to prevent hum.
-
-
The Brain: Your Computer
-
Mac or PC, it doesn't really matter, as long as it has enough processing power to run your recording software smoothly and sufficient hard drive space for your (potentially large) audio files.
-
-
The Scribe: Recording Software
-
Free & Powerful:
-
Audacity: The undisputed king of free audio editors. Cross-platform (Windows, macOS, Linux), incredibly versatile, and more than capable for this task. It has a bit of a learning curve but is well-documented.
-
GarageBand (macOS only): Easier to use for Mac users, quite capable for basic recording and editing.
-
-
Paid & Specialized:
-
Adobe Audition: Professional-grade audio editor with advanced features (and a subscription fee).
-
VinylStudio: Software specifically designed for digitizing vinyl, with features to streamline the process like automatic track splitting and noise reduction.
-
Ableton Live, Logic Pro X, Cubase, etc.: Full Digital Audio Workstations (DAWs) are overkill for simple transfers but can be used if you already own them.
-
-
The Ritual of Connection: Hooking It All Up
The exact connection path depends on your gear. Always ensure all components are powered OFF when making or changing connections.
-
Scenario 1: USB Turntable
-
Connect the turntable's USB output to a USB port on your computer.
-
If your USB turntable has a Phono/Line switch, ensure it's set to Line (as the RIAA equalization and pre-amplification are happening onboard before USB conversion).
-
-
Scenario 2: Turntable (No Built-in Preamp) -> External Phono Preamp -> Audio Interface -> Computer
-
Connect turntable RCA cables to the Input of your external phono preamp.
-
Connect the turntable's ground wire to the phono preamp's ground screw.
-
Connect RCA cables from the Output of your phono preamp to the Line Inputs on your audio interface.
-
Connect the audio interface's USB output to your computer.
-
-
Scenario 3: Turntable (Built-in Preamp) -> Audio Interface -> Computer
-
Set your turntable's output switch to Line.
-
Connect turntable RCA cables to the Line Inputs on your audio interface.
-
Connect the audio interface's USB output to your computer.
-
(If your turntable still has a ground wire, and your interface has a ground post, connect it. Some line-out configurations might not require it if hum isn't present).
-
-
Scenario 4: Turntable -> Amplifier/Receiver (with Phono In & Rec Out) -> Audio Interface -> Computer
-
Connect turntable RCA cables to the Phono Input on your amplifier/receiver.
-
Connect the turntable's ground wire to the amplifier/receiver's ground screw.
-
Connect RCA cables from the amplifier/receiver's REC OUT (or Tape Out) jacks to the Line Inputs on your audio interface. Do NOT use speaker outputs or headphone jacks!
-
Connect the audio interface's USB output to your computer.
-
-
Scenario 5: (The Compromise) Turntable (Built-in Preamp) -> Computer's Line-In Jack
-
Set your turntable's output switch to Line.
-
Use an RCA-to-3.5mm stereo cable to connect the turntable's RCA outputs to your computer's Line-In (often a blue jack).
-
The Iconoclast's Caveat: This is generally the lowest quality method. Your computer's onboard sound card is usually not designed for high-quality audio capture and is prone to noise and interference. Use only if you have no other option.
-
The Incantation: Software Setup & Level Setting
This is where precision matters. Garbage in, garbage out.
-
Software Configuration:
-
Open your recording software.
-
In the audio settings/preferences, select your Input Device. This will be your USB Turntable or your Audio Interface (e.g., "Focusrite USB," "USB Audio CODEC").
-
Recording Format:
-
Bit Depth: Choose 24-bit if available. This provides more dynamic range and a lower noise floor than 16-bit.
-
Sample Rate: 44.1kHz (CD quality) is the minimum. 48kHz, 88.2kHz, or 96kHz can offer finer detail, but also create much larger files. For most purposes, 24-bit/48kHz or 24-bit/96kHz is a good target for archiving.
-
Record as a WAV or AIFF file (lossless formats). You can create compressed MP3s or AACs later.
-
-
-
Setting Recording Levels (The Crucial Dance):
-
Your goal is to get the loudest possible signal without clipping (digital distortion, which sounds horrible and is irreversible).
-
Clean Your Record & Stylus: Do this before setting levels and recording. A dirty record will give you false peaks.
-
Find the loudest passage on the record side you intend to record.
-
Start playback. In your recording software, enable input monitoring or "record arm" the track so you can see the input level meters.
-
Adjust the input gain knob on your audio interface (or the recording level slider in your USB turntable's driver software, if it has one).
-
Aim for peaks hitting between -12dBFS and -6dBFS (decibels Full Scale). This leaves you "headroom" to avoid unexpected loud passages from clipping. Never let it hit 0dBFS or go into the red!
-
It's better to record a little too quietly (you can boost it later, though this might raise the noise floor) than too loudly.
-
Capturing the Essence: The Recording Process
-
Once levels are set, cue your record to the beginning of the side (or track).
-
Click the Record button in your software.
-
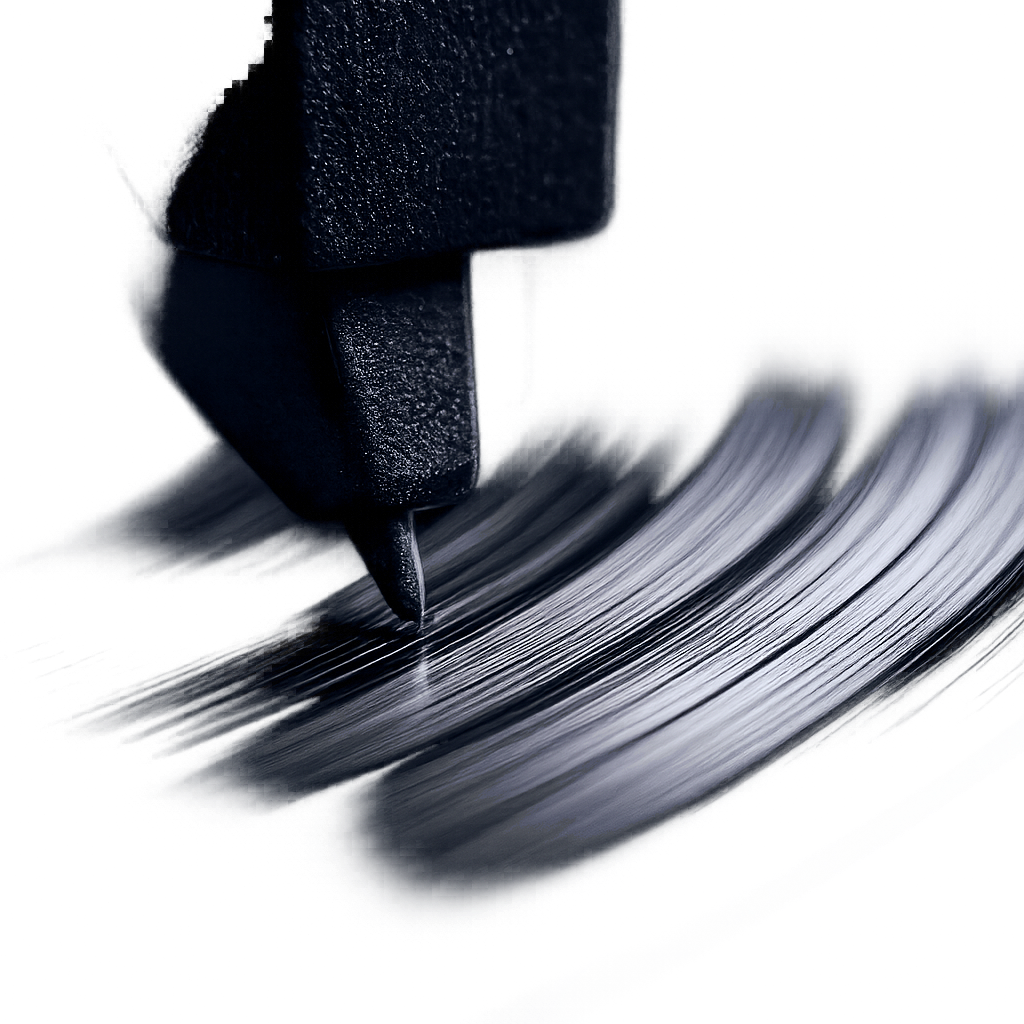
Gently lower the stylus onto the record.
-
Let the entire side (or selected tracks) play through. Avoid bumping the turntable or making loud noises in the room.
-
When finished, lift the stylus and stop the recording in your software.
-
SAVE YOUR RAW RECORDING IMMEDIATELY! Give it a clear, descriptive name (e.g., "AlbumTitle_SideA_RAW.wav").
The Refinement: Post-Production Alchemy
Your raw recording is just the beginning. Now, we polish. (Audacity is excellent for all these steps).
-
Trimming: Remove the silence and lead-in/lead-out groove noise at the beginning and end.
-
DC Offset Removal (if necessary): Some recordings might have a DC offset, which shifts the waveform off the center line. Most software has a tool for this.
-
Normalization (Optional & Careful): This boosts the entire recording so the loudest peak hits a specific level (e.g., -1.0dBFS or -0.1dBFS). Use it if your recording is a bit quiet, but be aware it affects the entire dynamic range.
-
Click & Pop Removal:
-
Software tools (e.g., Audacity's "Click Removal" and "Repair" effects) can automate much of this. Experiment with settings.
-
For stubborn clicks, you might need to zoom in and manually redraw a tiny portion of the waveform (advanced).
-
Less is more. Over-processing can make the recording sound sterile or introduce artifacts. Some gentle surface noise is part of the vinyl charm.
-
-
Noise Reduction (Use With Extreme Caution):
-
Tools can analyze a section of "silence" (e.g., between tracks) to create a noise profile and then attempt to remove that noise (hiss, rumble) from the entire recording.
-
This is dangerous territory. Aggressive noise reduction can easily suck the life out of the music, creating "swishy" artifacts or dulling high frequencies. Use sparingly, if at all. A well-maintained turntable and clean records should minimize the need for this. For a deep dive into audio restoration techniques, the Sound On Sound magazine archives often have excellent articles.
-
-
Track Splitting: If you recorded a whole side, you'll want to split it into individual tracks.
-
In Audacity, you can add labels at the start of each song, then use "Export Multiple" based on labels.
-
-
Fades (Optional): Add short fade-ins/fade-outs to tracks if desired.
-
Tagging Metadata: This is crucial for organization. Add Artist, Album, Track Title, Year, Genre, and Album Art.
-
Software like Mp3tag (Windows), MusicBrainz Picard (cross-platform), or your music player software (iTunes/Apple Music) can do this.
-
The Final Form: Exporting Your Digital Gold
-
Archival Copies: Export your edited tracks as WAV or AIFF files at the same bit depth and sample rate you recorded at (e.g., 24-bit/96kHz). These are your lossless master copies.
-
Listening Copies: For everyday listening and portability:
-
FLAC (Free Lossless Audio Codec): Best of both worlds – lossless quality, but files are about half the size of WAV. Highly recommended.
-
MP3 (320kbps CBR): Good quality lossy compression for portable devices where space is a concern.
-
AAC (256kbps or higher): Another good lossy option, common in the Apple ecosystem.
-
-
Organize: Create a clear folder structure for your digitized vinyl.
Troubleshooting the Transmutation
-
Hum/Buzz: Usually a grounding issue. Ensure your turntable's ground wire is securely connected. Try different outlets, move cables away from power sources.
-
Distortion: Recording levels too high (clipping). Re-record with lower input gain.
-
Thin/No Bass Sound: Phono preamp not engaged (if needed), or RIAA equalization not applied correctly.
-
One Channel Missing: Loose cable, dirty connection, or an issue with your cartridge/stylus.
The Analog Soul in a Digital Vessel
Digitizing your vinyl is a labor of love, a meticulous process that, when done right, allows you to carry the warmth and character of your favorite records wherever you go. It doesn't diminish the value of the physical artifact; it complements it, offering new ways to engage with the music you cherish. Every step, from cleaning the record to carefully setting levels and thoughtfully editing the digital file, contributes to the final quality – a philosophy of care and attention to detail that we at XJ-HOME apply to everything audio.
The journey from groove to gigabyte can be incredibly rewarding. Take your time, experiment, and enjoy the process of giving your vinyl collection a new digital life.
What are your biggest challenges or triumphs in recording vinyl to your computer? Share your experiences below!
Leave a comment
All comments are moderated before being published.
This site is protected by hCaptcha and the hCaptcha Privacy Policy and Terms of Service apply.